Setting up Google Analytics answers questions like:
- How many conversions did my Facebook campaign trigger?
- How is my content performing?
- Do visitors actually watch the video I produced?
- Which product category is the most popular?
- Are there any pages that perform particularly badly?
- Do people drop out during the checkout process? and more!
So let’s dive in and start setting up your Google Analytics 4.
How to set up Google Analytics
Let’s talk about how to set up a new GA4 account. Later, we’ll discuss how to upgrade your existing Universal GA account to GA4.
Step 1: Set up Google Tag Manager
First, you will have to create an account on the Google Tag Manager dashboard.
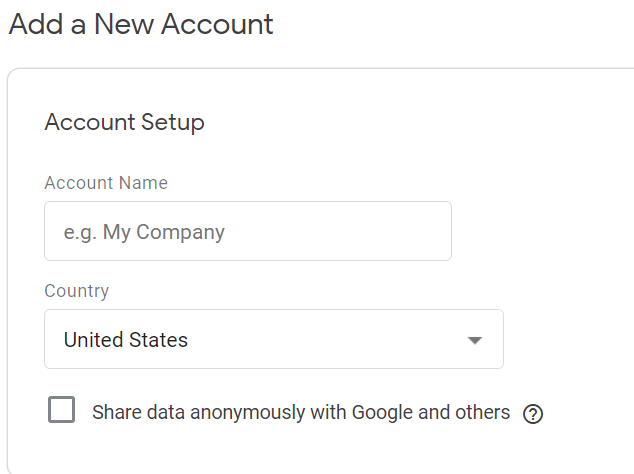
Enter the Account Name, Country and click Continue.
You’ll then set up a container, which is essentially a bucket containing all of the “macros, rules, and tags” for your website.
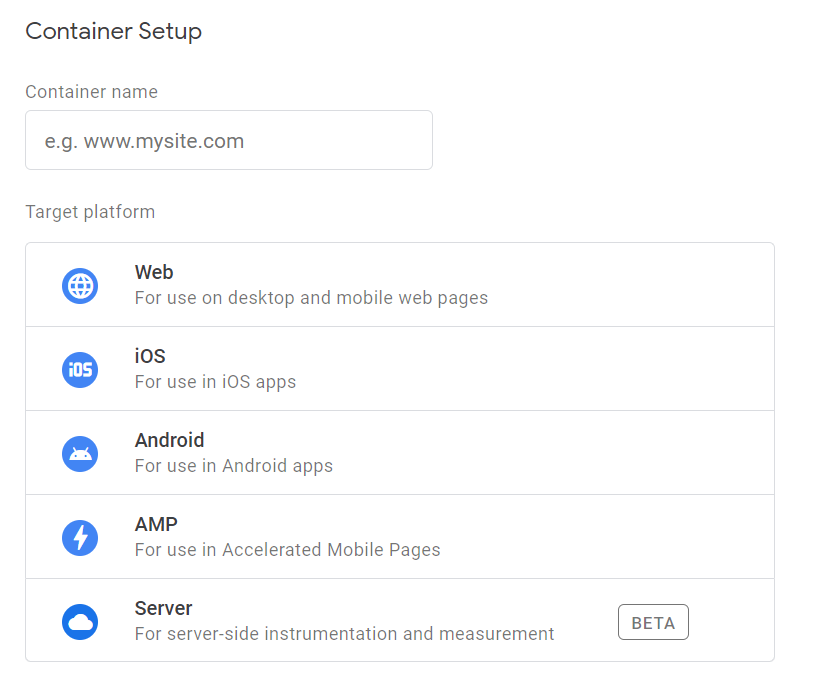
Give your container a descriptive name and select the type of content it’ll be associated with (Web, iOS, Android, AMP, or Server).
Once that’s done, click Create, review the Terms of Service, agree to those terms, and click on Yes. You’ll then be given the container’s installation code snippet.
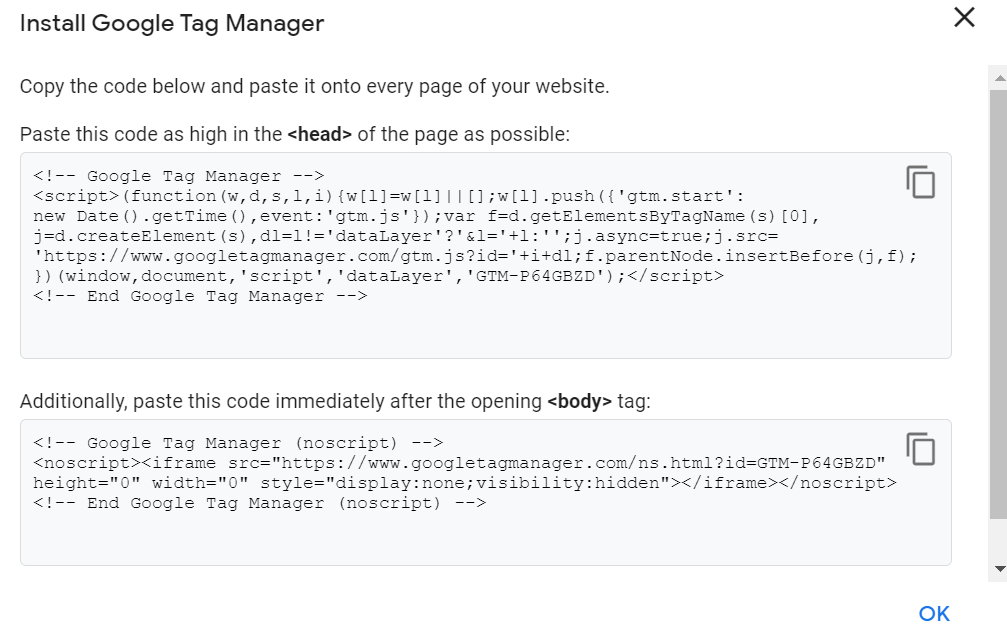
This is the piece of code you’ll be pasting into your website’s backend to manage your tags. To do that, copy and paste the two snippets of code onto the header of every page of your website.
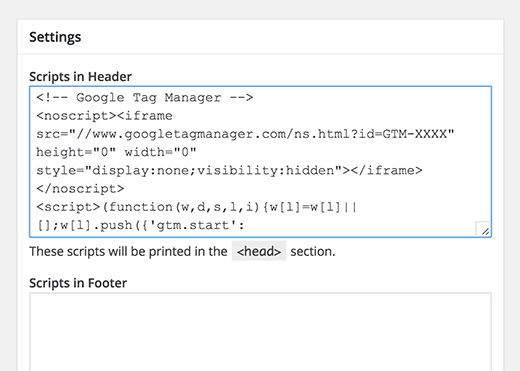
If you’re using WordPress, install and activate the “Insert Headers and Footers” plugin for WordPress. This will allow you to add any script to the header and footer throughout your entire website, but you only have to copy and paste it once.
Pretty much every content management system out there (like Webflow, Wix, Squarespace, etc.) will all have its own version of this. Check out their docs pages for help.
Step 2: Set up Google Analytics
- Log in to Google account and go to https://analytics.google.com/analytics/
- Click on the “Start Measuring” Button.
- Enter your Account Name and click Next.
- Now, enter your Property Name, Time Zone, and Currency. To make a Universal Analytics Property along with GA4 analytics property click on the “Show Advanced Options” and turn the toggle to On.
- Enter the Website URL and select the “Create both a Google Analytics 4 and a Universal Analytics property” option. Click Next.
- Enter your Business details now. Select Industry Category, Business size, and How do you intend to use Google Analytics with your business. Click Create. Accept the Terms of Service Agreement and click “I Accept”.
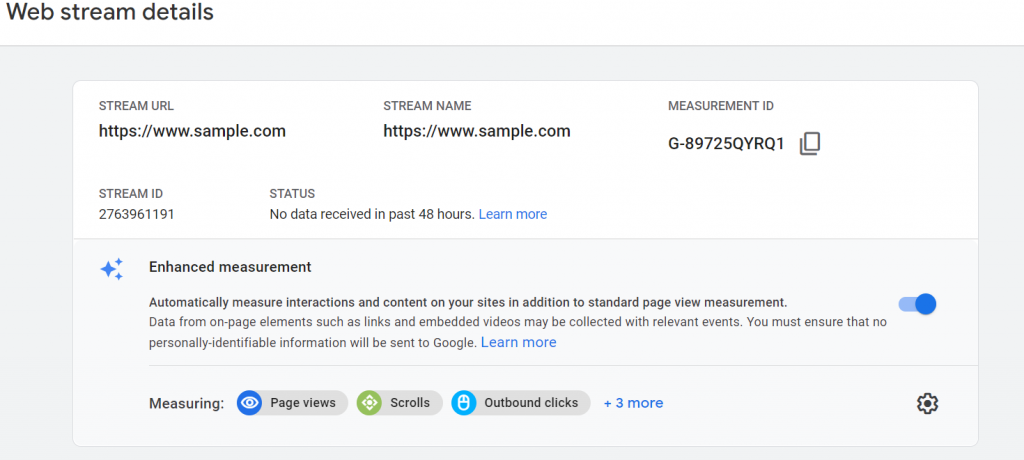
- Next step, set up the Web Stream to start collecting data. Choose a platform (Web, Android App, or iOS app). I selected “Web”.
- Here you can find the Measurement ID. Copy or note the Measurement ID as it is required for setting up the GA4 Configuration Tag in Google Tag Manager.
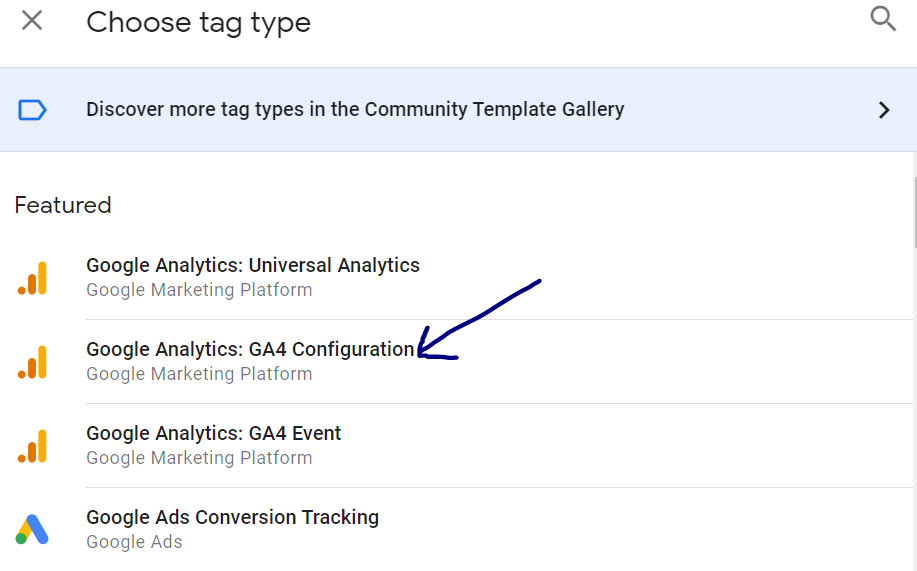
9. Navigate to your Google Tag Manager Dashboard. Click Create a New Tag. Select ‘Tag Configuration,’ and choose ‘Google Analytics: GA4 Configuration’ as the Tag Type.
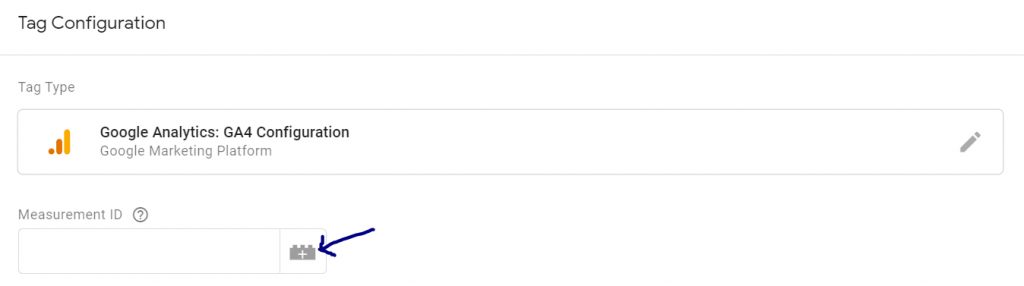
10. Next, we’re going to add the Measurement ID. I recommend creating a Constant Variable for the Measurement ID instead of entering it manually.
11. In order to create a Constant Variable, click on the Variable icon.
12. Click on + to create a new Variable. Now, click on choose variable type.
13. Now select Constant under Utilities.
14. Enter your GA4 Measurement ID into the Value field and hit Save.
15. Now, configure your Trigger to fire on All Pages and hit Save to complete the GA4 Configuration.
16. And done! Now that you’ve set up GA4, you can start using it to track users and their actions more effectively.
How to upgrade your existing Universal GA account to GA4
It’s time to set up GA4 on your Google Analytics account.
Upgrading to GA4 simply means you will have a much better data model than the old version of Google Analytics. Also, upgrading to the new version doesn’t mean you will lose your existing data. It will simply be transferred to the new version.
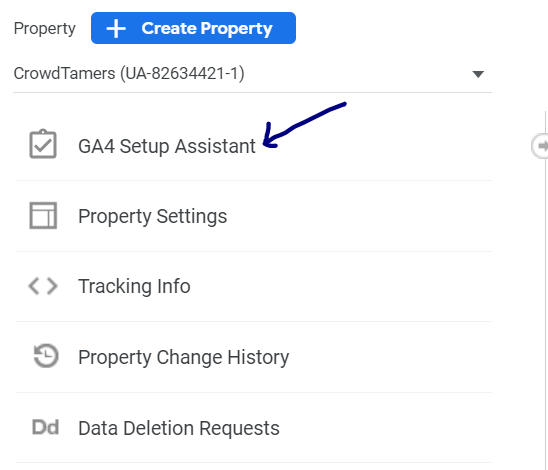
- Go to the Admin Panel of your Google Analytics Account. Under Property, you’ll find GA4 Setup Assistant.
2. Click ‘Get Started’ to begin the setup process with Google Analytics setup. Then you’ll have several options depending on your current GA setup. If you’re using the Google Site Tag to implement UA, the wizard will be able to enable data collection with your existing tags. If you’re not using the Global Site Tag, the following steps will outline how to enable data collection using Google Tag Manager (GTM).
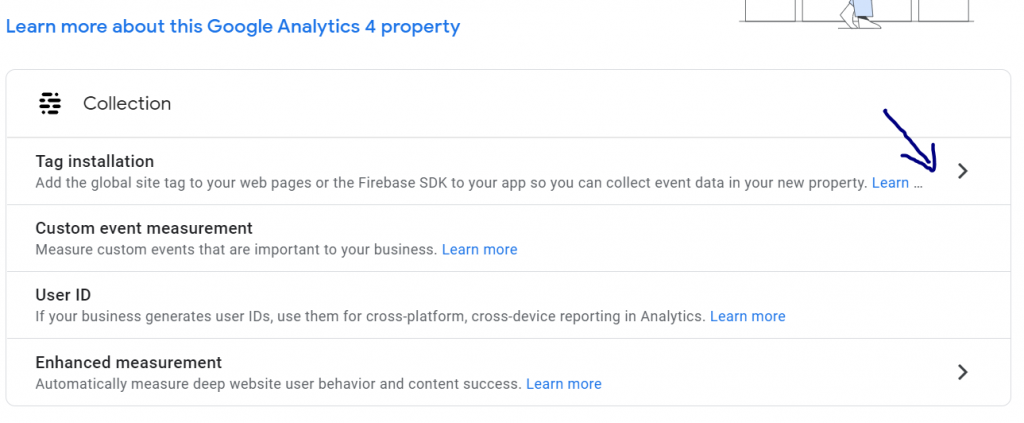
3. To start the data collection, we will need to generate a Measurement ID for our new GA4 Property. The Measurement ID is similar to the UA ID. Enter the ‘Tag installation’ menu.
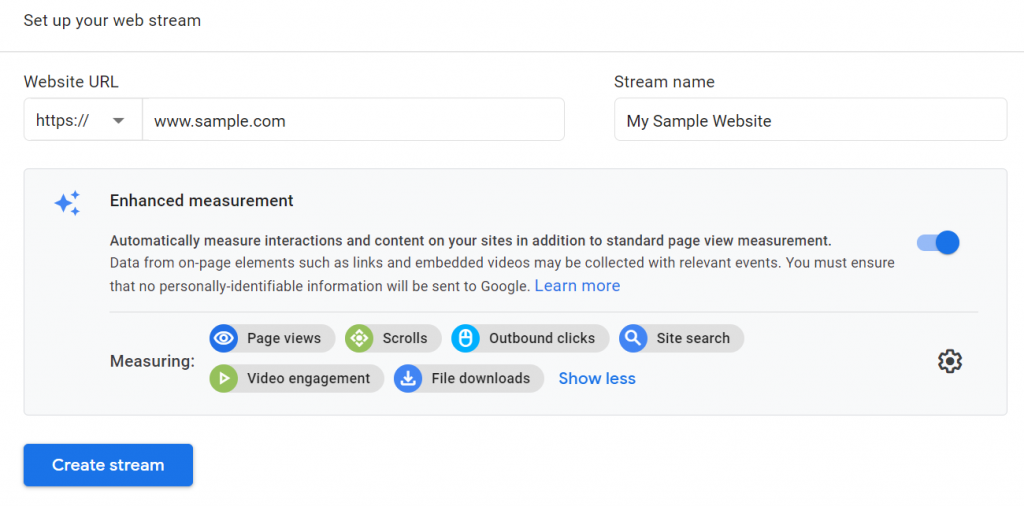
4. GA4 doesn’t have Views like Universal Google Analytics. Instead, it has Data Streams. The Data Stream expands beyond the Pageview Request as it measures certain events automatically such as Outbound Link Clicks, Scrolls, File Downloads, Site Search, and much more. Expand the Add Stream dropdown and select the app to track.
5. For this example, I’ve selected “Web”.

6. Configure your Web Stream by entering your Website URL and Stream name. Click ‘Create Stream’ when done.
7. This will generate your Measurement ID.
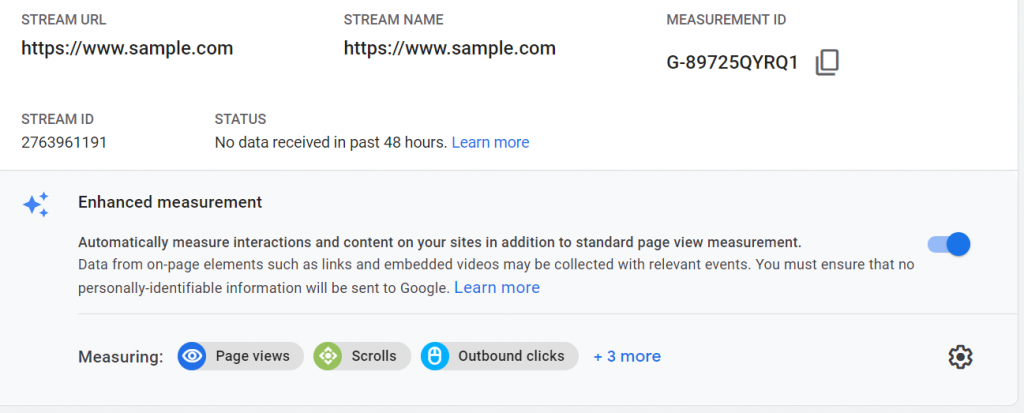
8. Now, copy the Measurement ID and log in to your Google Tag Manager.
9. Repeat steps from 9 to 15 from the above section.
Voila! You have successfully set up your Google Analytics.
If you have any feedback or questions, please leave a comment in the section below.